

It’s crafting time! Make a giant map to play on!
It’s crafting time! Make a giant map to play on!
Part one of… Me making a giant map from foam.

Welcome back everyone I hope this past week has treated you well, and if not I hope this week is much better for you. I know some of you might be expecting the delayed Part 2 of the Town Fabrication Machine, maybe not…
I’ve been extra busy at work this week attempting to bring back to life a failed aspect of the business while also trying to learn more about it. When the weekend hit, I only had one thing on my mind, that was crafting a large playable map inspired by Tabletop Times - ‘most SATISFYING Tiny Kingdom’.
With the crossing of Beltane off our lists, winter is dead and so is my enthusiasm for working on mechanics. Part two will be coming later than expected unless someone actually wants it. It’s mostly written, it just needs filling out, grammar and spell checks and a few pictures to make it look pretty. Let me know if you’re waiting on it and I’ll pop it in the oven. Such is the joy of ADHD, my interest goes where the dopamine lies.
That being said, this is another part one of most likely a two or three part series documenting my progress, and sharing it in the hopes of showing others what’s possible. I know, shame on me…
The hobby foam I get a Lowes in the same area where they sell the pink insulation foam. It’s probably worth it to just buy the large sheet of the pink foam and just cut it down in the parking lot to fit into your vehicle then cut it so shape when you get home, at least cost wise. But I don’t have a foam cutter, yet and I suck at cutting straight lines even with the guide of t-square or the like.
I’m working with 2’ x 2’ (feet) approximately of hobby foam. I say approximately because I often get pieces that are an inch or so smaller, so watch for that, measure before you leave the store.
Please note that I use a 3D printer to print out things like the World Tree, the villages, castles, and most, but not all of the props, some I make myself or are made from parts that I have lying around. But you don’t need a 3D printer, you just need a desire to have some fun creating your own world.
The 3D printed materials so far are from the Hexon Hills collection. I’m printing them at the size they come in, however, some people are printing them at 200% their original size. I’ve not tried, that but it seems to work. I’m fine with the current scale, as use mostly 10-15mm miniatures and while this is a bit small even for that scale, it works for me.
Here are a few pictures of my progress so far. I Break it down more below, starting with the bare foam.


Before all that, however, was an entire weekend of work. Which started with the bare foam, which I hot glue gunned together after cutting it with a knife, as shown below.


I use a combination of a pocket knife and various utility and a wood carving set I picked up at an estate sale years ago. The one in the link is similar. A grind stone is essential, even with foam as it does eventually dull your blades. A foam cutter could work here, but it I find the look to be too generic, so even if I had one, I wouldn’t use it to carve out details. I find hand cutting produces errors consistent with what you’d expect to find in natural and warn structures.
No pointing in thinking about it, or if you’re good enough. Doesn’t really matter either. Just start and figure it out as you go. You’ll find that you’re more than capable and what you lack is only a matter of trying a few times before becoming a professional. Even if you don’t have a 3D printer, there is a ton you can just create by carving out foam or creating your down tiny village from popsicle sticks, or clay. I’ve done quite a bit of that prior to finally taking the plunge into 3D printing, so I know you can do it too.


After carving out several features, and working out where some locations might be, such as the tree of life, atop the mountain. I simply carved out a space for it and secured it with hot glue. I then begin to coat the entire thing in a beige colored latex I found at Lowe’s, in their discounted return’s section they have at most every paint center. I think I paid $2 for this sample sized container which is enough for about 3 pieces this size, give or take. I usually use black as a base, but I’m really low and didn’t want to make the trip. Latex is waterproof and durable, works great as a base.
Next I used a similar colored sand as a a means of filling the gaps, and building up some terrain, such as small hills, and adding texture to various areas. I simply use my fingers to drop and push it about into corners and gaps, into small dunes, and to create paths and minor details.
Once I was satisfied with the look so far I sprayed it all down with a spray bottle mixed with PVA glue, mod podge and a bit of water. Experimentation here works best. If it gets clogged squirt some hot water through it and add some more water to your mix.
If can be thick, but expect it to take days and at least 2-3 applications for best results.
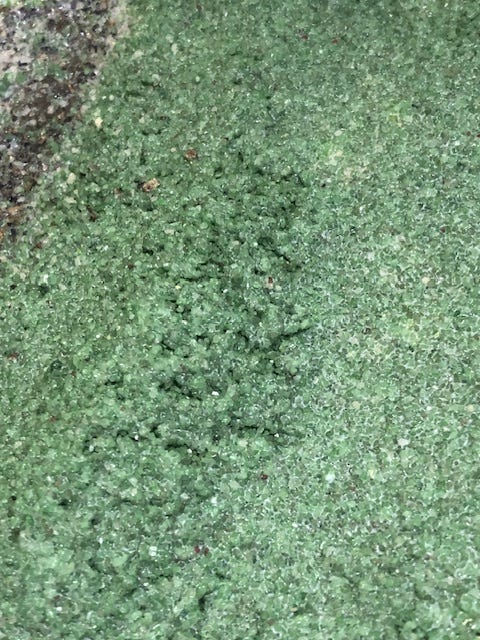
Note the above image. It’s from later on down the line but I wanted to show you something. This was with some green sand that was about an inch thick. As I the spray soaked in it left these holes. I simply spray sprinkled a bit more on top, pushed it in and sprayed again. This is common and needs to either flattened or filled in unless you like this look.
I have to be honest, this was my first attempt at using sand, usually I use plaster of paris, however, it’s messy and takes a lot time making sure the mixture is correct. So I tried sand and to my surprise it worked out. The next morning it was mostly dry, the thicker area remained somewhat pliable well into the evening, and I suspect another day or two required for full dryness.


This morning I set out some paints and begin to fill in the waterfall, lake and river with paint. I paint it first, adding in white for rapids, and blues for the calmer areas, and a dark Prussian blue to add depth to the deeper parts of the lake and river.
I then use a hot glue gun and about 15 glue sticks to fill in the lake and river, and create the waterfall. There are other more popular choices for water, but I find glue sticks and paint to be effective for water. After it’s dried I drag the tip of the glue gun across the water to add a sense of motion and other effects, as well as add to the waterfall. I then go over it again, dry brushing with a bit of blue, some greens and finishing with dry brushing of white for the rapids and such.
The rocks were an after thought and added, then sprayed to say in place. I got them from an ant pile outside.
From here I simply added some greens to the stone to mimic a sense of grassy area’s, dappled it with a few other colors to mimic flowers and other plants.
And that’s it for this week everyone. I’m just about out of time to get this published and I think this is enough of an update for this week. Excuse the typos and or spelling, I didn’t get a lot of time to fix that…
Have a wonderful week everyone! Take care of yourselves, listen more to yourself, and be kind to others. Appreciate you all!